
Setări din BIOS
NOTĂ: Poziţia efectivă a portului LAN diferă în funcţie de model.
Consultaţi capitolul precedent pentru a vedea unde se află portul LAN.
Boot (Pornire sistem)
Acest meniu vă permite să stabiliţi prioritatea dispozitivelor de pornire
a sistemului de operare. Atunci când stabiliţi această prioritate, puteţi
consulta următoarele proceduri.
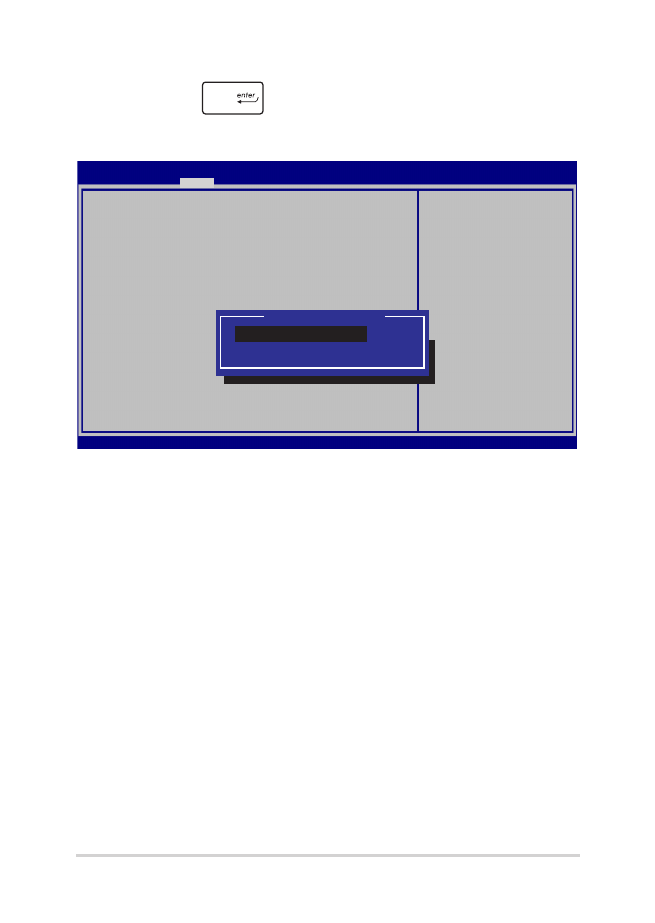
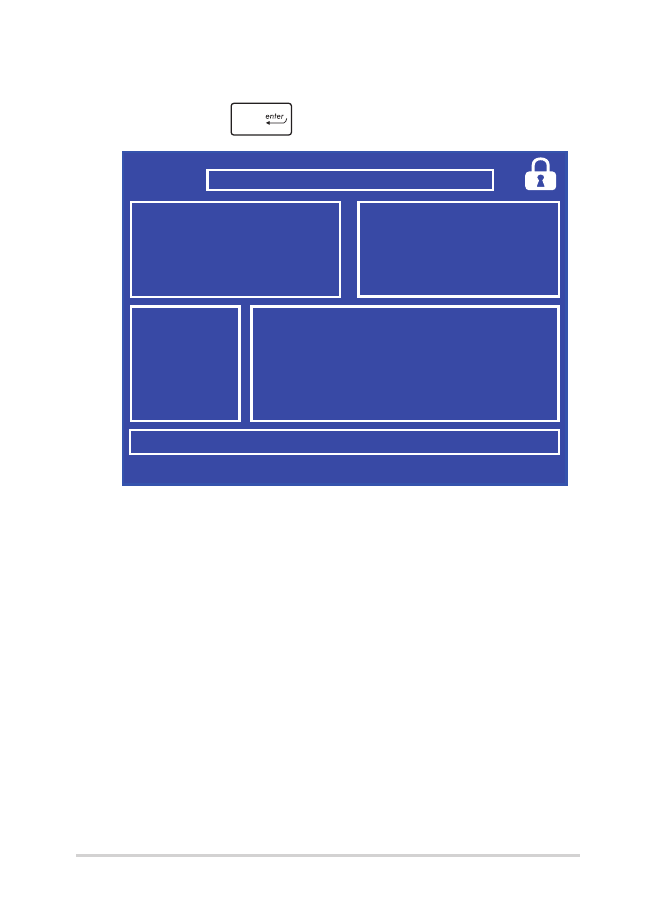
1.
În ecranul Boot (Pornire sistem), selectaţi Boot Option #1. (Pornire
sistem prima opţiune).
→←
: Select Screen
↑↓
: Select Item
Enter: Select
+/— : Change Opt.
F1 : General Help
F9 : Optimized Defaults
F10 : Save & Exit
ESC : Exit
Boot Configuration
Fast Boot [Enabled]
Launch CSM [Disabled]
Driver Option Priorities
Boot Option Priorities
Boot Option #1 [Windows Boot Manager]
Add New Boot Option
Delete Boot Option
Sets the system boot
order
Aptio Setup Utility - Copyright (C) 2012 American Megatrends, Inc.
Main Advanced
Boot
Security Save & Exit
Version 2.15.1226. Copyright (C) 2012 American Megatrends, Inc.
80
Manual electronic pentru notebook
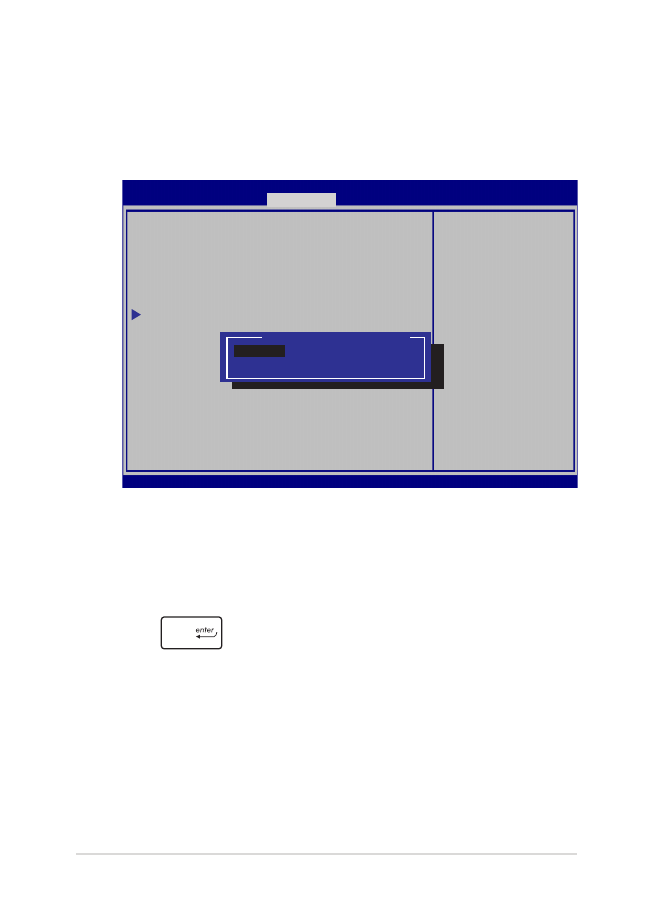
2.
Apăsaţi pe
şi selectaţi un dispozitiv, conform cu Boot
Option #1 (Pornire sistem prima opţiune).
→←
: Select Screen
↑↓
: Select Item
Enter: Select
+/— : Change Opt.
F1 : General Help
F9 : Optimized Defaults
F10 : Save & Exit
ESC : Exit
Sets the system
boot order
Aptio Setup Utility - Copyright (C) 2012 American Megatrends, Inc.
Main Advanced
Boot
Security Save & Exit
Version 2.15.1226. Copyright (C) 2012 American Megatrends, Inc.
Boot Configuration
Fast Boot [Enabled]
Launch CSM [Disabled]
Driver Option Priorities
Boot Option Priorities
Boot Option #1 [Windows Boot Manager]
Add New Boot Option
Delete Boot Option
Boot Option #1
Windows Boot Manager
Disabled

Manual electronic pentru notebook
81
Security
(Securitate)
Acest meniu vă permite să setaţi parola de administrator şi parola de
utilizator pentru accesarea notebookului. De asemenea, acest meniu
vă permite să controlaţi accesul la unitatea de hard disc, la interfaţa de
intrare/ieşire (I/O) şi la interfaţa USB.
NOTĂ:
•
Dacă instalaţi o User Password (Parolă utilizator), vi se va solicita să
introduceţi această parolă înainte de intrarea în sistemul de operare
al notebookului.
•
Dacă instalaţi o Administrator Password (Parolă administrator),
vi se va solicita să introduceţi această parolă înainte de intrarea în
sistemul BIOS.
Password Description
If ONLY the Administrator’s password is set,
then this only limits access to Setup and is
only asked for when entering Setup. If ONLY
the user’s password is set, then this is a
power on password and must be entered to boot
or enter Setup. In Setup, the User will have
Administrator rights.
Administrator Password Status NOT INSTALLED
User Password Status NOT INSTALLED
Administrator Password
User Password
HDD Password Status : NOT INSTALLED
Set Master Password
Set User Password
I/O Interface Security
System Mode state User
Secure Boot state Enabled
Secure Boot Control [Enabled]
Key Management
Set Administrator
P a s s w o r d . T h e
password length
must be in the
following range:
Minimum length 3
Maximum length 20
Aptio Setup Utility - Copyright (C) 2012 American Megatrends, Inc.
Main Advanced Boot
Security
Save & Exit
→←
: Select Screen
↑↓
: Select Item
Enter: Select
+/— : Change Opt.
F1 : General Help
F9 : Optimized Defaults
F10 : Save & Exit
ESC : Exit
Version 2.15.1226. Copyright (C) 2012 American Megatrends, Inc.

82
Manual electronic pentru notebook
Pentru a seta parola:
1.
În ecranul Security (Securitate), selectaţi Setup Administrator
Password (Configurare parolă administrator) sau User Password
(Parolă administrator).
2.
Introduceţi o parolă şi apăsaţi
.
3.
Introduceţi din nou parola şi apăsaţi
.
Pentru a şterge parola:
1.
În ecranul Security (Securitate), selectaţi Setup Administrator
Password (Configurare parolă administrator) sau User Password
(Parolă administrator).
2.
Introduceţi parola curentă şi apăsaţi pe
.
3.
Nu completaţi nimic în câmpul Create New Password (Creare
parolă nouă) şi apăsaţi pe
.
4.
Selectaţi Yes (Da) în caseta de confirmare, apoi apăsaţi pe
.
Manual electronic pentru notebook
83
Securitate interfaţă I/O (intrare/ieşire)
În meniul Security (Securitate) puteţi accesa I/O Interface Security
(Securitate interfaţă I/O) pentru a bloca sau a debloca anumite
funcţii de interfaţă ale notebookului.
Pentru a bloca interfaţa I/O:
1. Din ecranul Securitate selectaţi Securitate interfaţă I/O.
2.
Selectaţi interfaţa pe care doriţi să o blocaţi şi faceţi clic pe
.
3. Selectaţi Lock (Blocare).
I/O Interface Security
LAN Network Interface [UnLock]
Wireless Network Interface [UnLock]
HD AUDIO Interface [UnLock]
USB Interface Security
If Locked, LAN
controller will
be disabled.
Aptio Setup Utility - Copyright (C) 2012 American Megatrends, Inc.
Security
→←
: Select
Screen
↑↓
: Select Item
Enter: Select
+/— : Change Opt.
F1 : General Help
F9 : Optimized
Defaults
F10 : Save & Exit
ESC : Exit
Version 2.15.1226. Copyright (C) 2012 American Megatrends, Inc.
LAN Network Interface
Lock
UnLock

84
Manual electronic pentru notebook
Securitate interfaţă USB
De asemenea, meniul I/O Interface Security (Securitate interfaţă
I/O) vă permite să accesaţi USB Interface Security (Securitate
interfaţă USB) pentru a bloca sau a debloca porturi şi dispozitive.
Pentru a bloca interfaţa USB:
1.
Din ecranul Securitate selectaţi Securitate interfaţă I/O >
Securitate interfaţă USB.
2. Selectaţi interfaţa pe care doriţi să o blocaţi şi faceţi clic pe
Blocare.
NOTĂ: Dacă setaţi USB Interface (Interfaţă USB) la Lock (Blocare), se
blochează şi se ascund, de asemenea, External Ports (Porturi externe) şi
alte dispozitive din USB Interface Security (Securitate interfaţă USB).
Version 2.15.1226. Copyright (C) 2012 American Megatrends, Inc.
USB Interface Security
USB Interface [UnLock]
External Ports [UnLock]
CMOS Camera [UnLock]
Card Reader [UnLock]
If Locked, all
USB device will
be disabled
Aptio Setup Utility - Copyright (C) 2012 American Megatrends, Inc.
Security
→←
: Select Screen
↑↓
: Select Item
Enter: Select
+/— : Change Opt.
F1 : General Help
F9 : Optimized
Defaults
F10 : Save & Exit
ESC : Exit
USB Interface
Lock
UnLock
Manual electronic pentru notebook
85
Set Master Password (Setare parolă principală)
În meniul Security (Securitate) puteţi utiliza Set Master
Password (Setare parolă principală) pentru a configura un
acces bazat pe parolă la unitatea de hard disk.
Pentru a seta parola HDD:
1.
Din ecranul Securitate faceţi clic pe Setare parolă
coordonator.
2.
tastaţi o parolă şi apăsaţi pe
.
3.
Retastaţi pentru confirmarea parolei şi apăsaţi pe
.
4.
Faceţi clic pe Setare parolă utilizator şi repetaţi paşii
precedenţi pentru a seta parola utilizatorului.
Aptio Setup Utility - Copyright (C) 2011 American Megatrends, Inc.
S e t H D D M a s t e r
Password.
***Advisable to
Power Cycle System
after Setting Hard
Disk Passwords***
Aptio Setup Utility - Copyright (C) 2012 American Megatrends, Inc.
Main Advanced Boot
Security
Save & Exit
→←
: Select
Screen
↑↓
: Select Item
Enter: Select
+/— : Change Opt.
F1 : General Help
F9 : Optimized
Defaults
F10 : Save & Exit
ESC : Exit
Version 2.15.1226. Copyright (C) 2012 American Megatrends, Inc.
Password Description
If ONLY the Administrator’s password is
set,then this only limits access to Setup
and is only asked for when entering Setup.
If ONLY the user’s password is set, then
this is a power on password and must be
entered to boot or enter Setup. In Setup,
the User will have Administrator rights.
Administrator Password Status NOT INSTALLED
User Password Status NOT INSTALLED
Administrator Password
User Password
HDD Password Status : NOT INSTALLED
Set Master Password
Set User Password
I/O Interface Security

86
Manual electronic pentru notebook
Save & Exit (Salvare şi ieşire)
Pentru a păstra setările de configurare, selectaţi Save Changes and Exit
(Salvare modificări şi ieşire) înainte de a ieşi din BIOS.
Aptio Setup Utility - Copyright (C) 2012 American Megatrends, Inc.
Main Advanced Boot Security
Save & Exit
→←
: Select Screen
↑↓
: Select Item
Enter: Select
+/— : Change Opt.
F1 : General Help
F9 : Optimized Defaults
F10 : Save & Exit
ESC : Exit
Version 2.15.1226. Copyright (C) 2012 American Megatrends, Inc.
Save Changes and Exit
Discard Changes and Exit
Save Options
Save Changes
Discard Changes
Restore Defaults
Boot Override
Windows Boot Manager
Launch EFI Shell from filesystem device
Exit system setup
after saving the
changes.
Manual electronic pentru notebook
87
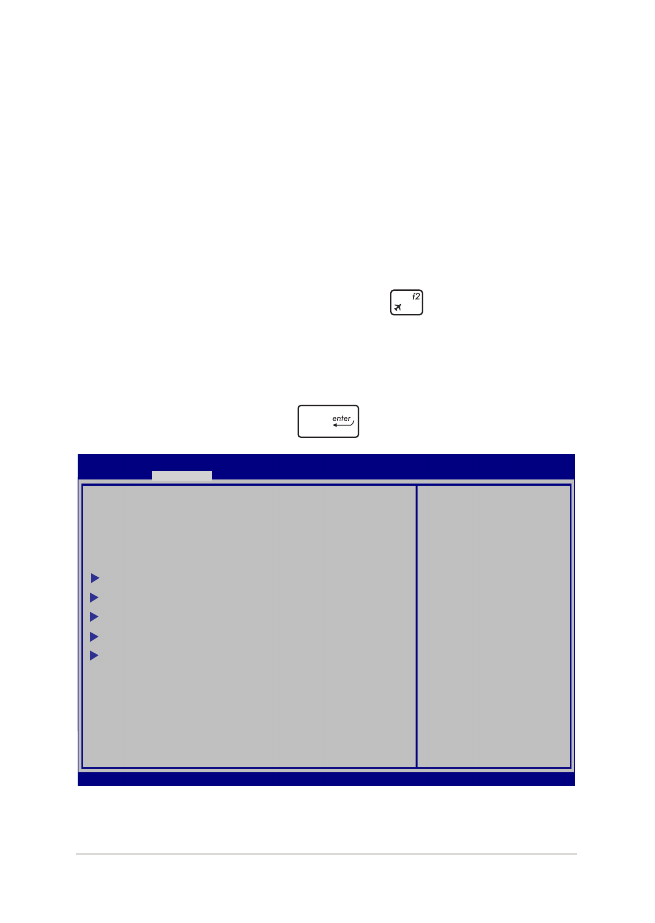
Actualizarea BIOS-ului.
1.
Verificaţi modelul exact al notebookului dvs. şi apoi descărcaţi
cel mai recent fişier BIOS pentru modelul dvs. de pe site-ul Web
ASUS.
2.
Salvaţi o copie a fişierului BIOS descărcat pe o unitate de memorie
flash.
3.
Conectaţi unitatea de memorie flash la notebook.
4.
Reporniţi notebookul, apoi apăsaţi pe
în timpul procedurii
POST.
5.
În programul BIOS Setup (Configurare BIOS), faceţi clic pe
Advanced (Complex) > Start Easy Flash (Pornire Actualizare
uşoară), apoi apăsaţi pe
.
Aptio Setup Utility - Copyright (C) 2011 American Megatrends, Inc.
Start Easy Flash
Internal Pointing Device [Enabled]
Wake on Lid Open [Enabled]
Power Off Energy Saving [Enabled]
SATA Configuration
Graphics Configuration
Intel (R) Anti-Theft Technology Corporation
USB Configuration
Network Stack
Press Enter to run
the utility to
select and update
BIOS.
Aptio Setup Utility - Copyright (C) 2012 American Megatrends, Inc.
Main
Advanced
Boot Security Save & Exit
→←
: Select Screen
↑↓
: Select Item
Enter: Select
+/— : Change Opt.
F1 : General Help
F9 : Optimized Defaults
F10 : Save & Exit
ESC : Exit
Version 2.15.1226. Copyright (C) 2012 American Megatrends, Inc.
88
Manual electronic pentru notebook
6.
Localizaţi fişierul BIOS descărcat pe unitatea de memorie flash,
apoi apăsaţi pe
.
7.
După procesul de actualizare BIOS, faceţi clic pe Exit (Ieşire) >
Restore Defaults (Restabilire setări implicite) pentru a restabili
sistemul la setările implicite.
FSO
FS1
FS2
FS3
FS4
0 EFI
<DIR>
ASUSTek Easy Flash Utility
[←→]: Switch [↑↓]: Choose [q]: Exit [Enter]: Enter/Execute
Current BIOS
Platform: G751
Version: 101
Build Date: Oct 26 2012
Build Time: 11:51:05
New BIOS
Platform: Unknown
Version: Unknown
Build Date: Unknown
Build Time: Unknown
FLASH TYPE:
MXIC 25L Series

Manual electronic pentru notebook
89
Przywracanie systemu
Użycie opcji przywracania komputera notebook PC, umożliwia
przywrócenie systemu do jego oryginalnego stanu lub odświeżenie
ustawień w celu poprawienia działania.
WAŻNE!
• Przed rozpoczęciem w komputerze notebook PC jakichkolwiek opcji
przywracania, należy wykonać kopię zapasową wszystkich danych.
•
Aby uniknąć utraty danych należy zapisać wszystkie ważne,
dostosowane ustawienia, takie jak ustawienia sieci, nazwy
użytkownika i hasła.
•
Przed ponownym uruchomieniem systemu należy się upewnić, że
notebook PC jest podłączony do źródła zasilania.
Windows® 8.1 umożliwia wykonanie następujących opcji przywracania:
•
Refresh your PC without affecting your files (Odświeżenie
komputera PC, bez zmiany plików użytkownika) - Ta opcja
umożliwia odświeżenie komputera notebook PC, bez zmiany
plików osobistych (zdjęcia, muzyka, wideo, dokumenty) i aplikacji
z Windows® store.
Używając tej opcji, użytkownik może przywrócić domyślne
ustawienia notebooka PC i usunąć inne zainstalowane aplikacje.
•
Remove everything and reinstall Windows (Usunięcie
wszystkiego i ponowna instalacja Windows) - Ta opcja
resetuje notebook PC do jego ustawień fabrycznych. Przed
uruchomieniem tej opcji należy wykonać kopię zapasową swoich